

Calcaneus fracture is a common injury in clinical practice, accounting for 17% of foot fractures. Calcaneus fractures usually have obvious fracture displacement, and conservative treatment cannot effectively reduce the collapsed posterior articular surface and reconstruct the height and width of the calcaneus, so most calcaneal fractures require surgical treatment.
The “lateral L-shaped enlarged approach” is fully exposed and can be reduced under direct vision. Therefore, it has been the gold standard for internal fixation of calcaneal fractures for a long time. However, its surgical trauma is large and the postoperative wound-related complication rate is high, forcing clinicians to consider using other incisions.
The tarsal sinus approach is the mainstream calcaneal internal fixation approach at present. It has little trauma, little soft tissue irritation, and low wound complication rate, and has gradually replaced the traditional approach. The tarsal sinus approach also has its own characteristics, such as easy damage to tendons and nerves, insufficient exposure, etc., which still has certain technical barriers for junior doctors. Therefore, this article introduces the detailed steps of the tarsal sinus approach for reference by clinical doctors.
Surgical procedures
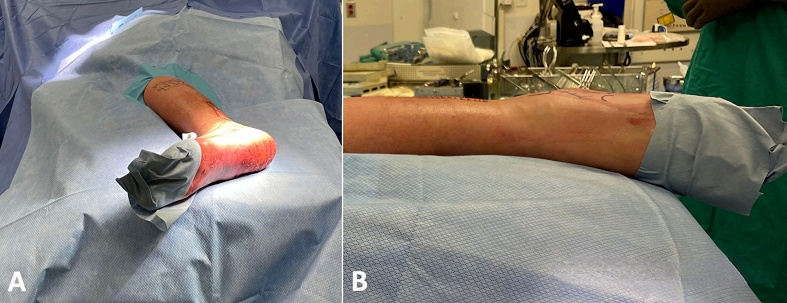
Step 1: Patient position and C-arm position.
The patient lies on the healthy side with the outside of the affected foot facing up and the affected foot elevated to facilitate fluoroscopic axial position.

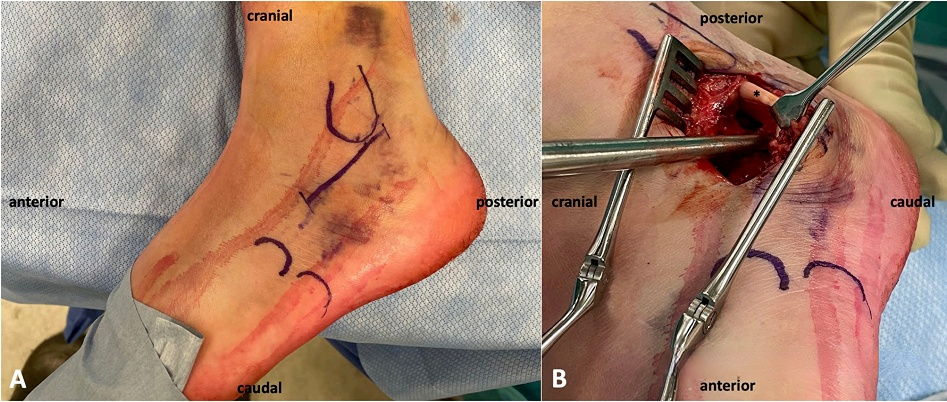
Step 2: Surgical incision.
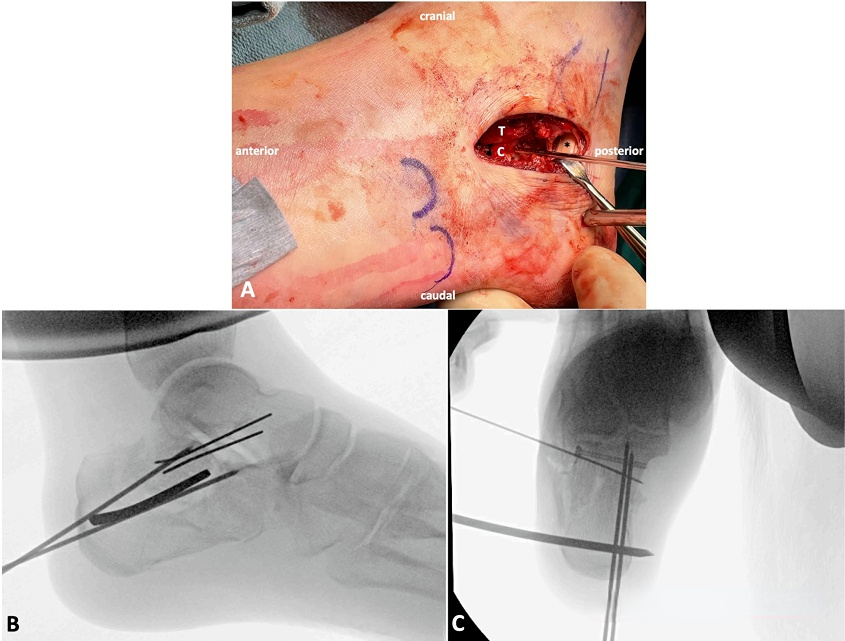
The incision starts from the tip of the lateral malleolus and extends along the base of the fourth metatarsal bone, about 5 cm long. When exposing this incision, care should be taken to protect the peroneal nerve and sural nerve. After finding the peroneal tendon, enter from above the peroneal tendon to expose it. Separate the soft tissue along the lateral wall of the calcaneus.
Step 3: Reset the medial wall of the calcaneus.
Before resetting the medial wall, it is necessary to evaluate whether the medial wall is stable. For unstable medial walls, they need to be relocated and fixed first. Using the cartilage surface below the talus as a reference, pry the medial wall by the fracture end. After resetting, insert a 1.6mm Kirschner wire through the talus to fix the medial wall. The Kirschner wire needs to be placed on the medial side of the anterior tibialis tendon or the lateral side of the extensor tendon to avoid damaging the anterior tibial blood vessels and nerve bundles.
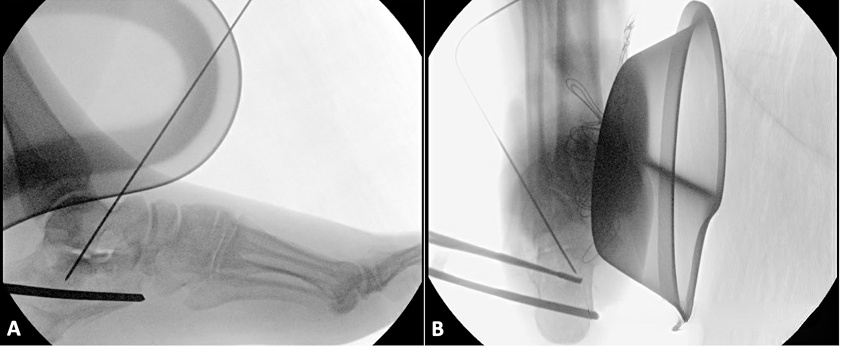
Step 4: Reset the calcaneal tuberosity.
Typical displacement of calcaneal fractures is loss of calcaneal height and Böhler angle, accompanied by varus deformity. A 5mm Steinmann wire is inserted through the incision in the posterior and inferior part of the calcaneal tuberosity, penetrating the bilateral cortex and used as a joystick to resize the tuberosity bone fragment. At this time, moderate axial and varus traction is required, and the reduction is evaluated by fluoroscopic calcaneal axial position. If the reduction is satisfactory, two 1.5mm Kirschner wires are inserted from the inner and inferior part of the calcaneal tuberosity to fix it to the medial bone fragment.
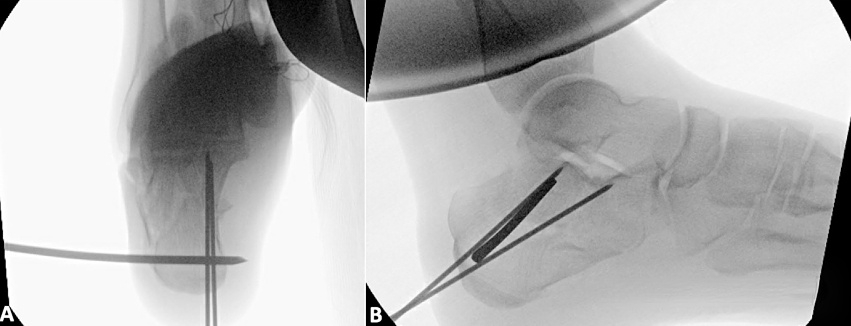
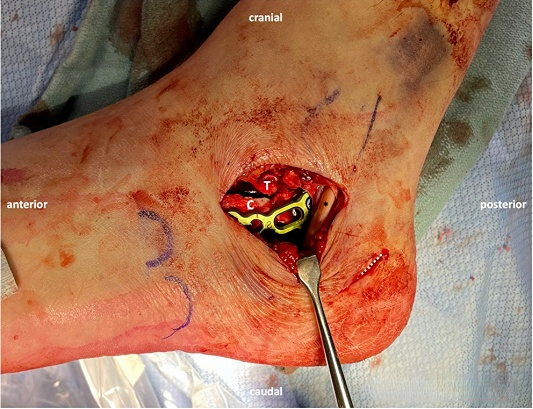
Step 5: Reset the subtalar articular surface.
After correcting the calcaneal inversion and shortening, the subtalar articular surface can be reset under direct vision. 1-2 2.7mm lag screws are inserted through the subchondral bone to fix the subtalar articular surface bone block. The screws need to be driven into the medial cortex to achieve bicortical fixation. The screw cap is buried in the bone surface to avoid affecting the insertion of the steel plate. If the calcaneal defect is large after reduction, bone grafting can be used for support, and finally the lateral wall is reset.
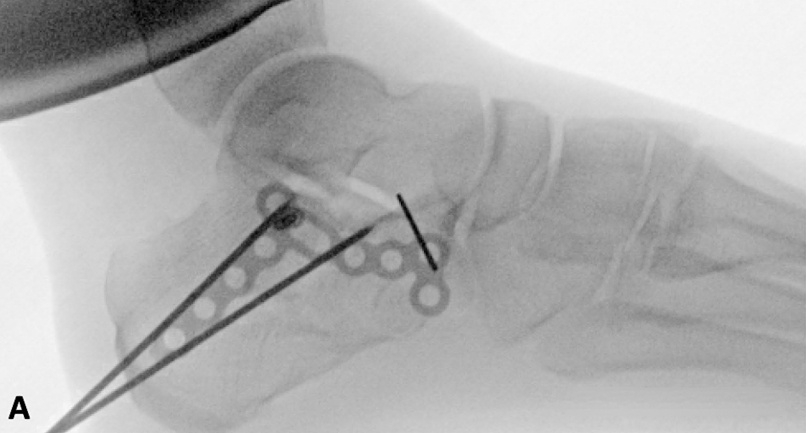
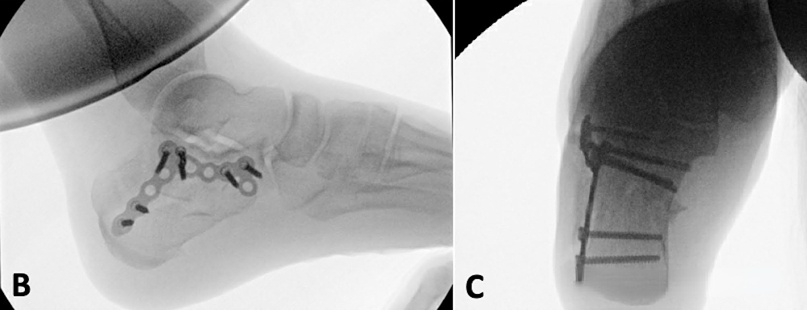
Step 6: Insert the plate and screws.
The plate covers the calcaneal tuberosity at the back and is close to the calcaneocuboid joint surface at the front, but the screws should be avoided from being inserted into the calcaneocuboid joint. The middle section of the plate is placed along the subtalar joint surface. After the lateral fluoroscopic view of the plate is satisfactory, first insert a 3.5mm compression screw into the compression screw hole in the middle section of the plate, and place the plate close to the lateral wall of the calcaneus. Each screw is inserted in turn. The screw at the calcaneal tuberosity usually requires an additional small incision.
[Statement]: The concepts, technologies, and principles shared on this platform are all publicly available journals, published books, or online platform materials. The copyright belongs to the original author. The platform only organizes, summarizes, and shares them for learning reference. This platform is not responsible for the authenticity of the content and the effectiveness of the technology. The related medical behaviors generated based on the content pushed by this platform have nothing to do with the platform. Please choose carefully. If there is any infringement, please contact us to delete it.
Welcome to share, forward and like the article in the lower right corner!